Mobile App Visual Guide
Every screen you'll encounter in the field, organized by workflow. Use this as a quick reference when learning the app or training new inspectors.
Getting Started
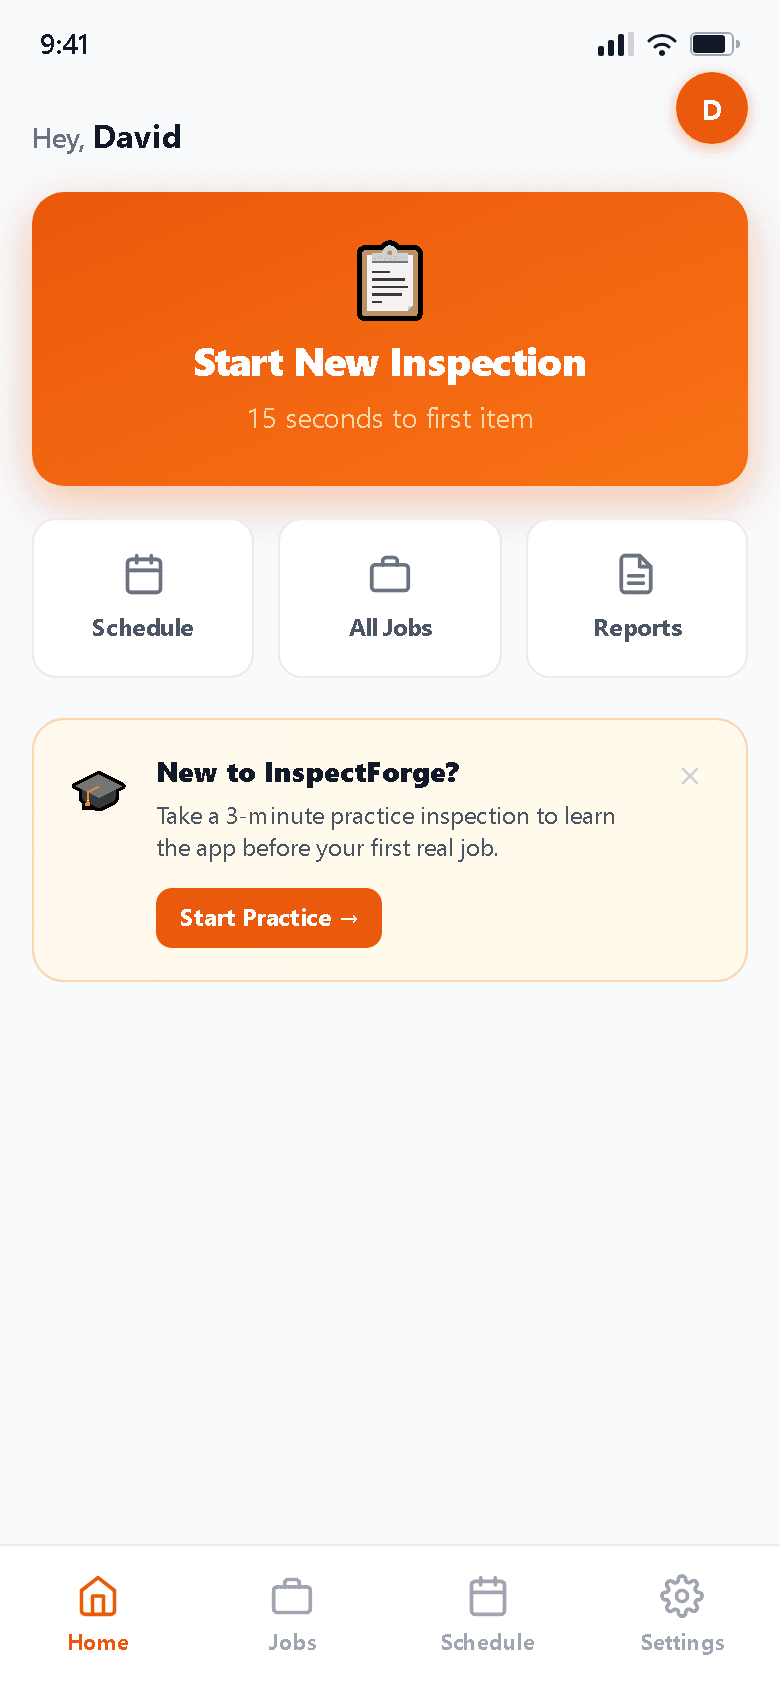
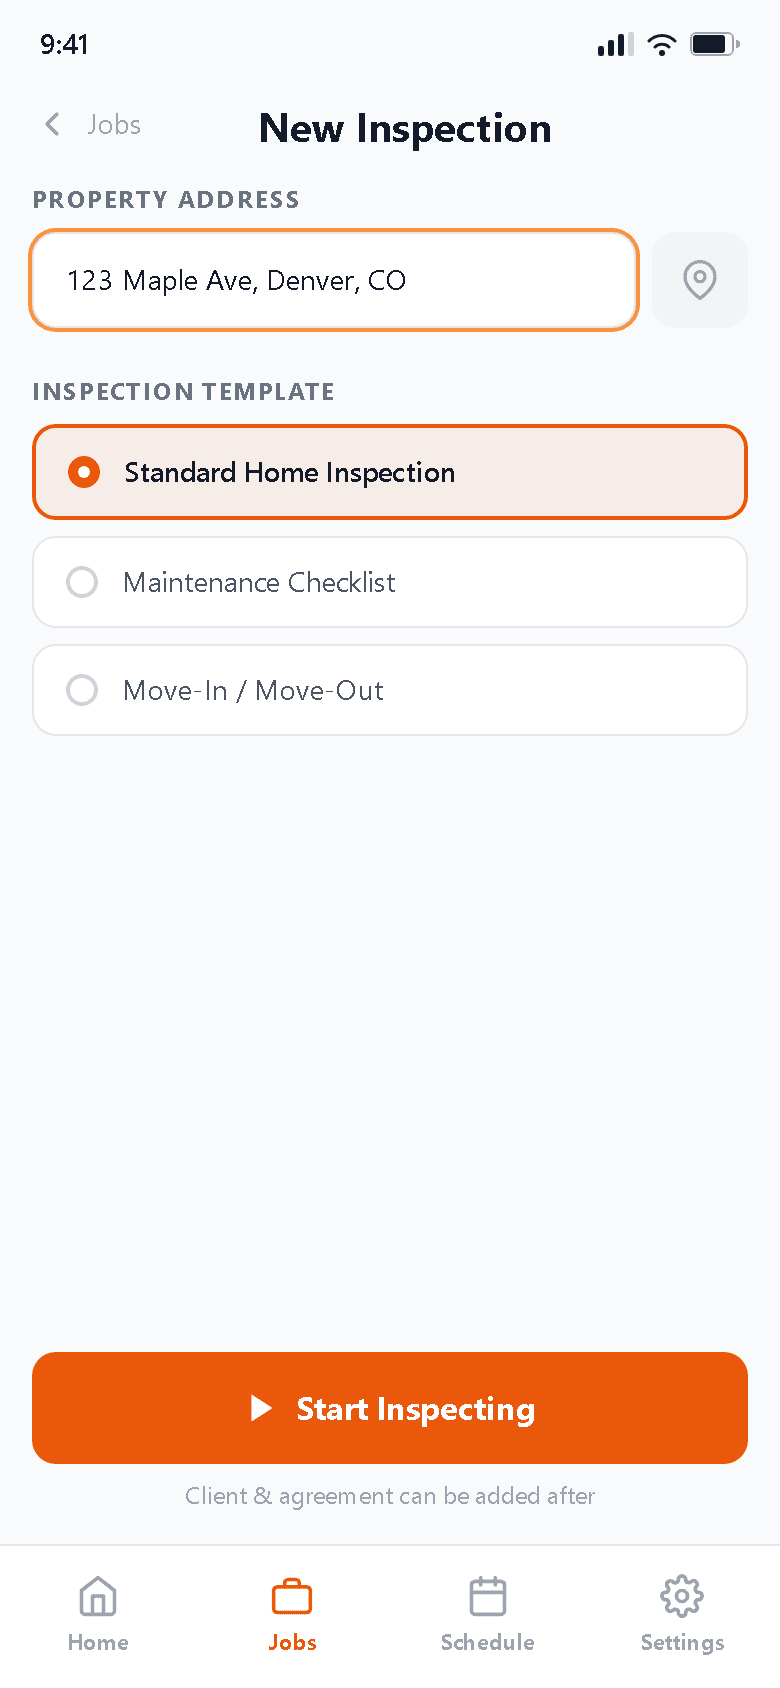
These are the first screens you see when you open the app. The home screen gives you one-tap access to start an inspection, and the Quick Start wizard gets you into your first item in under 30 seconds.
Home Screen
Your starting point every time you open the app. Tap "Start New Inspection" to immediately begin, or use the quick-action tiles to jump to Schedule, All Jobs, or Reports.
Quick Start Wizard
Enter the property address (or tap the GPS button to auto-fill), select your inspection template, then tap "Start Inspecting." Client name and agreement can be attached after you're done in the field.
Running Inspections
These screens are what you see while you're physically at the property. You move through each inspection item, assign a rating, take photos, and add comments — all from your phone.
Item Rating Screen
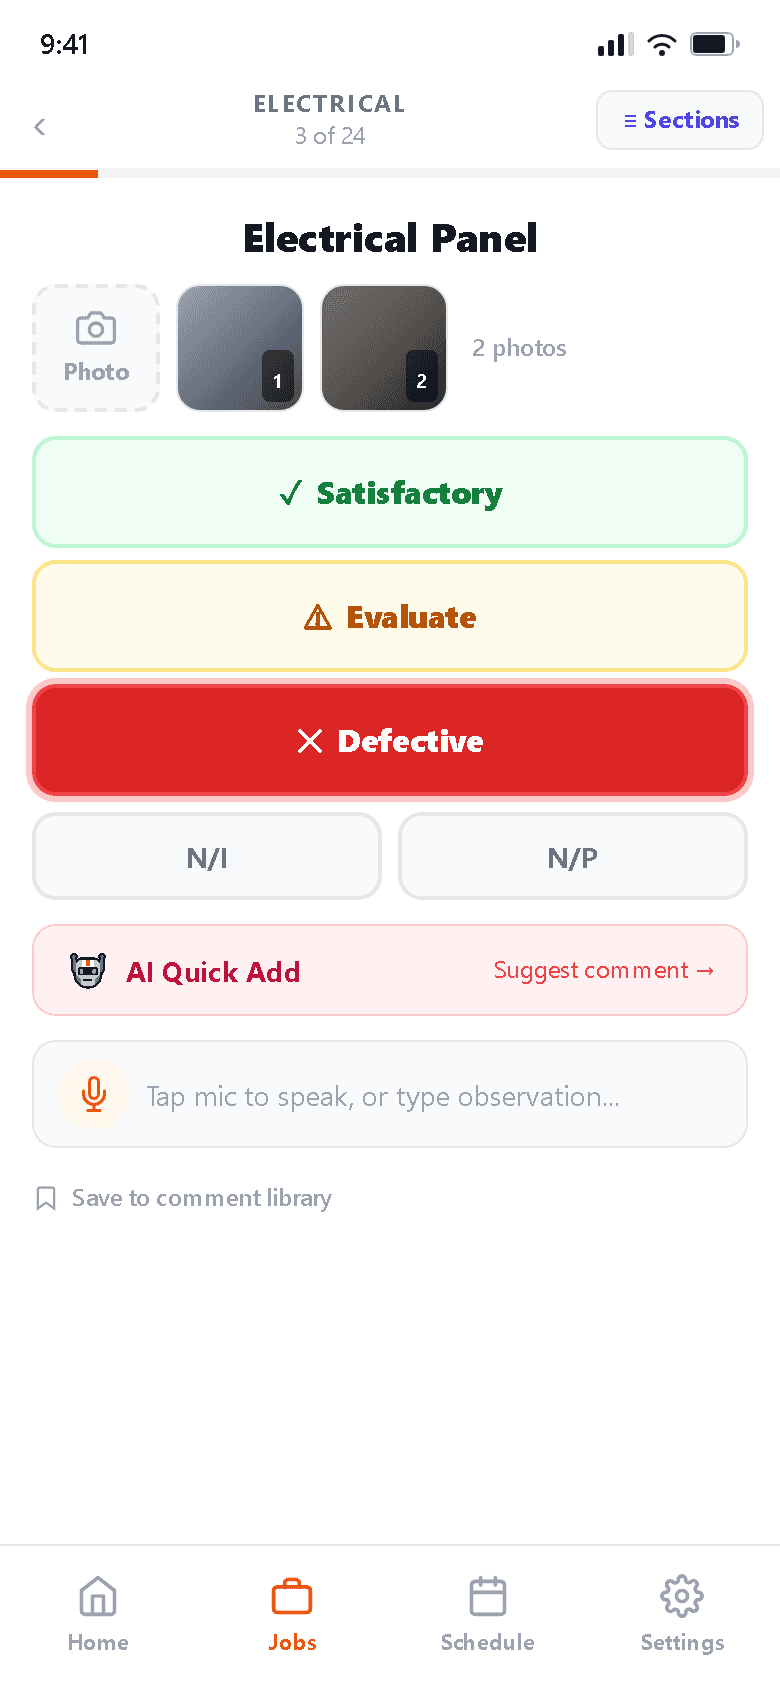
Tap Satisfactory, Evaluate, or Defective for each inspection item. The AI Quick Add button suggests a pre-written comment based on the defect type. Use the orange mic button to dictate observations by voice.
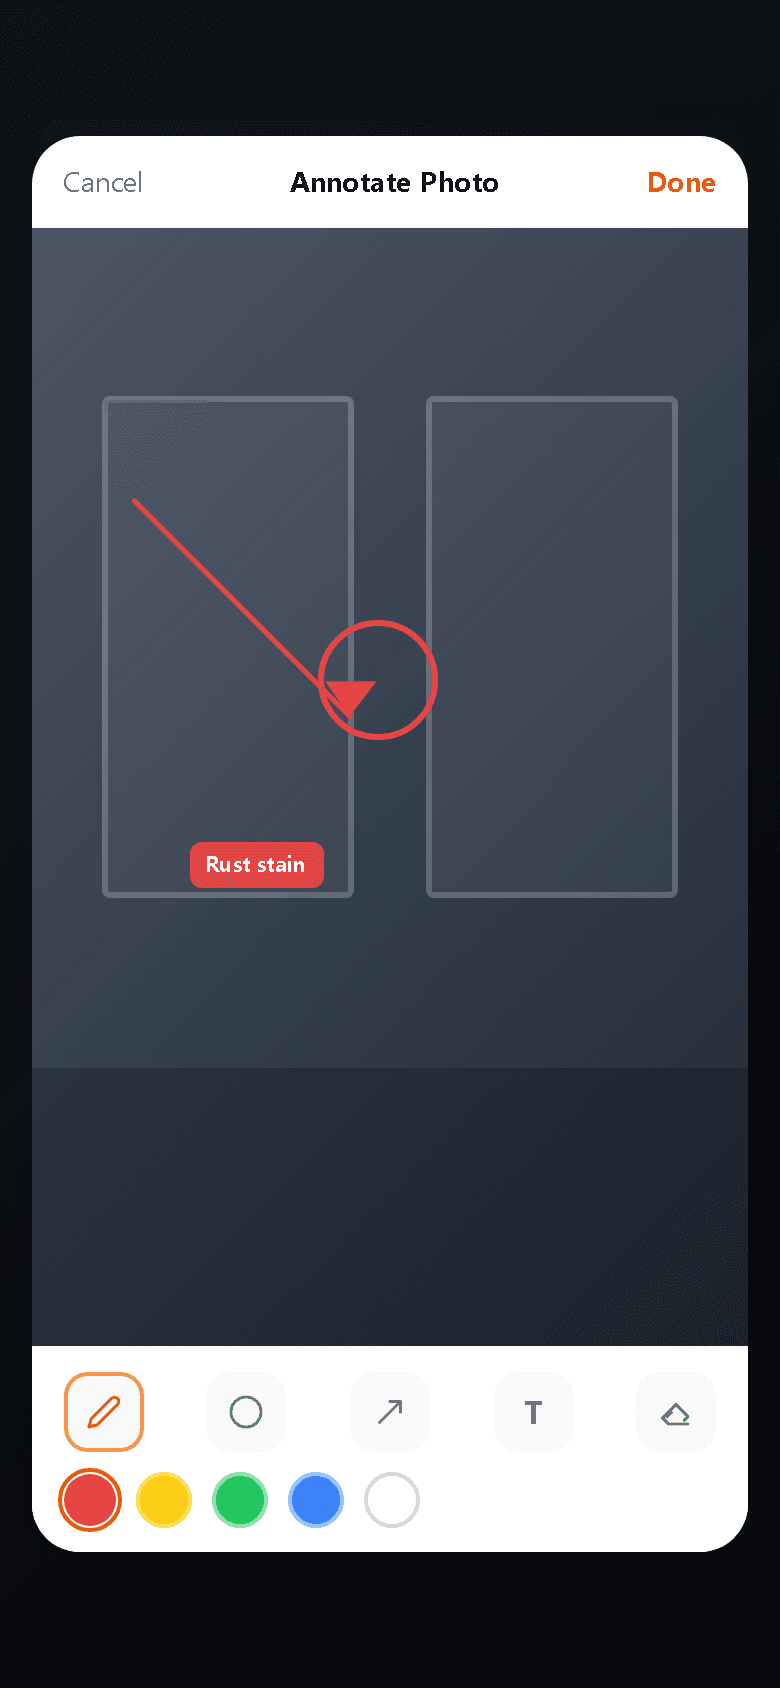
Photo Annotation
Draw directly on photos to call out problem areas. Use the pencil, circle, or arrow tools; pick a color; then tap Done. Annotations are embedded in the final PDF report.
Managing Your Jobs
The Jobs and Schedule sections let you see everything on your plate — past, present, and upcoming. The Inspection Detail screen shows all the key info for a single job at a glance.
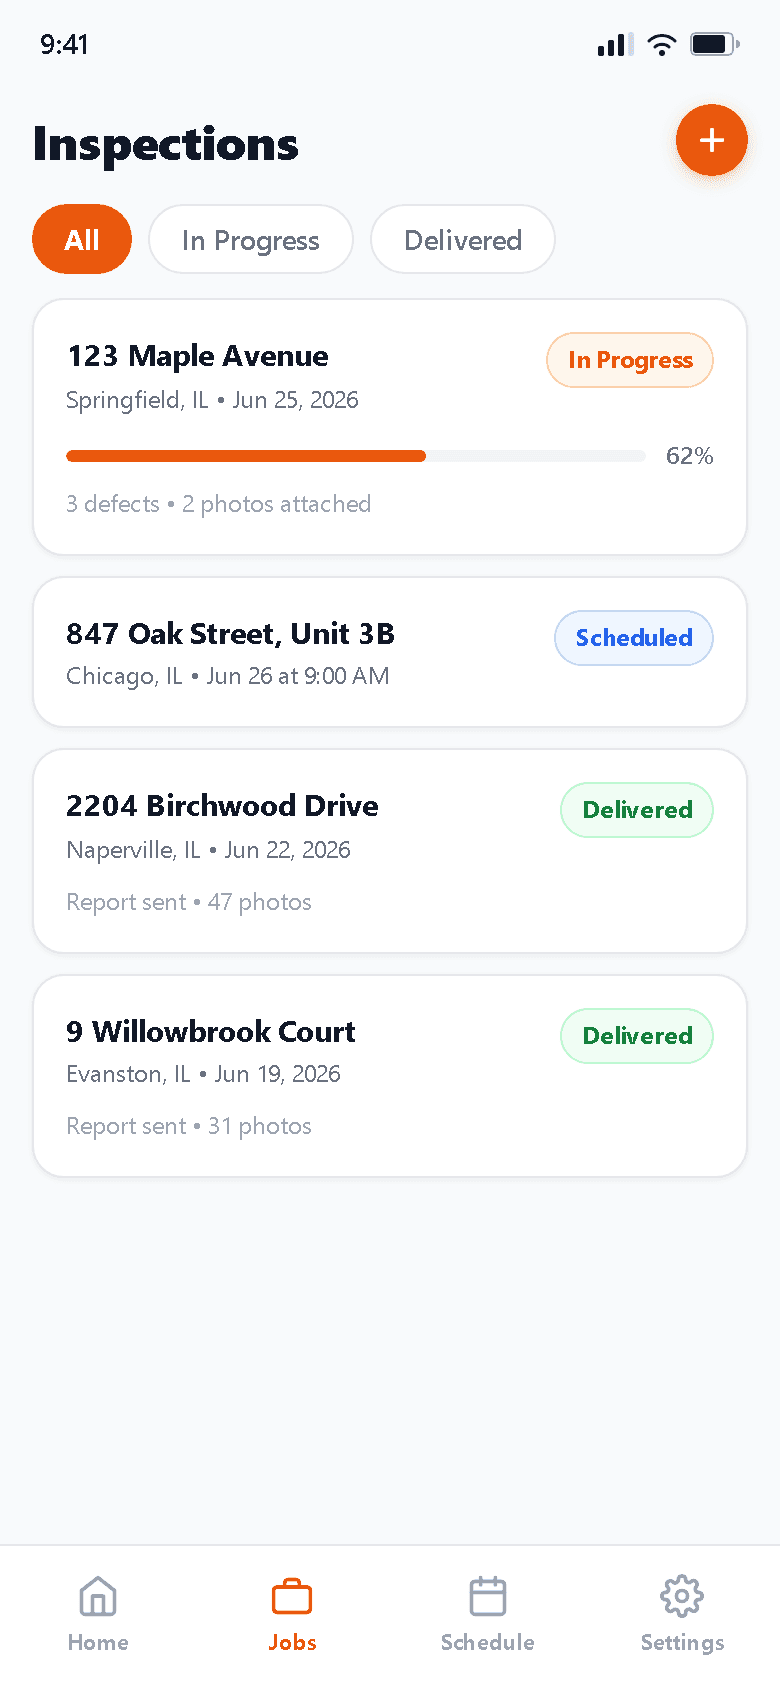
Jobs List
All your inspections in one scrollable list, filterable by status: In Progress, Scheduled, or Delivered. Tap any job to open its detail screen.
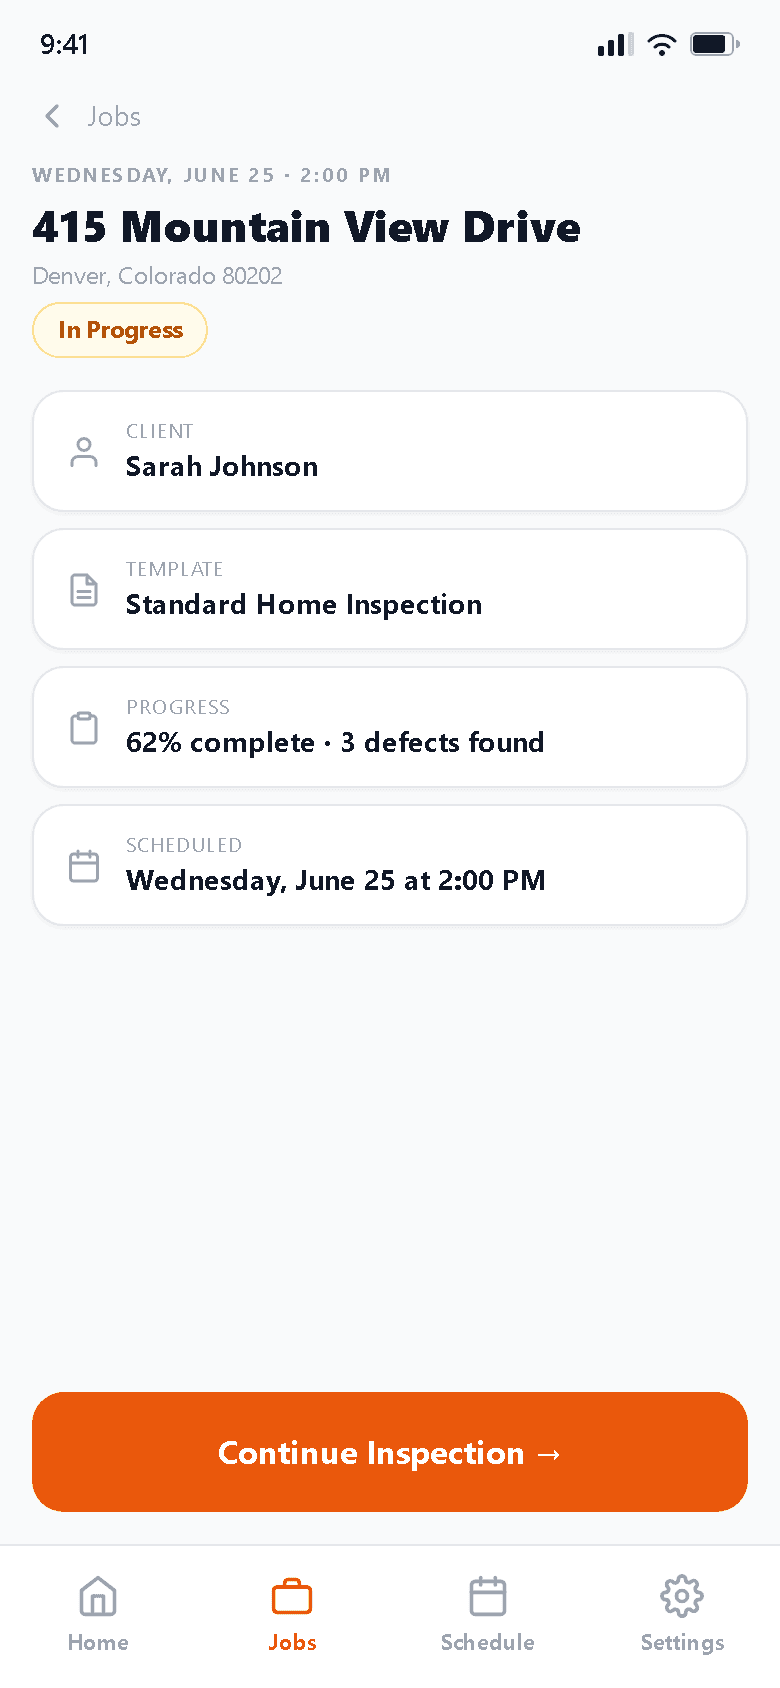
Inspection Detail
Shows the property address, client name, template, current progress percentage, and scheduled time. Tap "Continue Inspection" to pick up exactly where you left off.
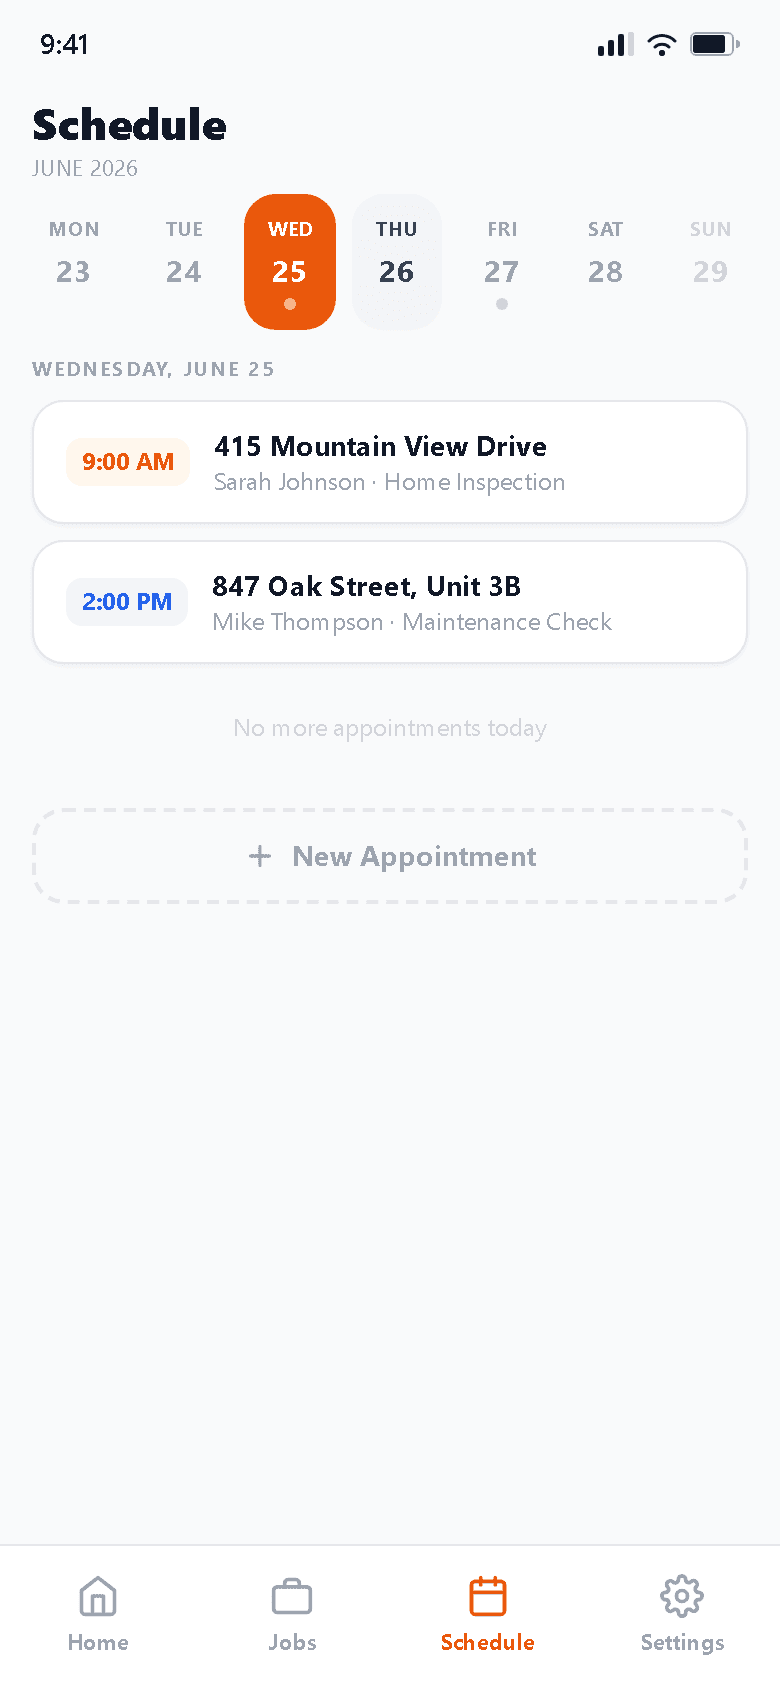
Schedule
A 7-day calendar strip at the top highlights today and any days with appointments. Tap a day to see the full list of jobs scheduled for that date.
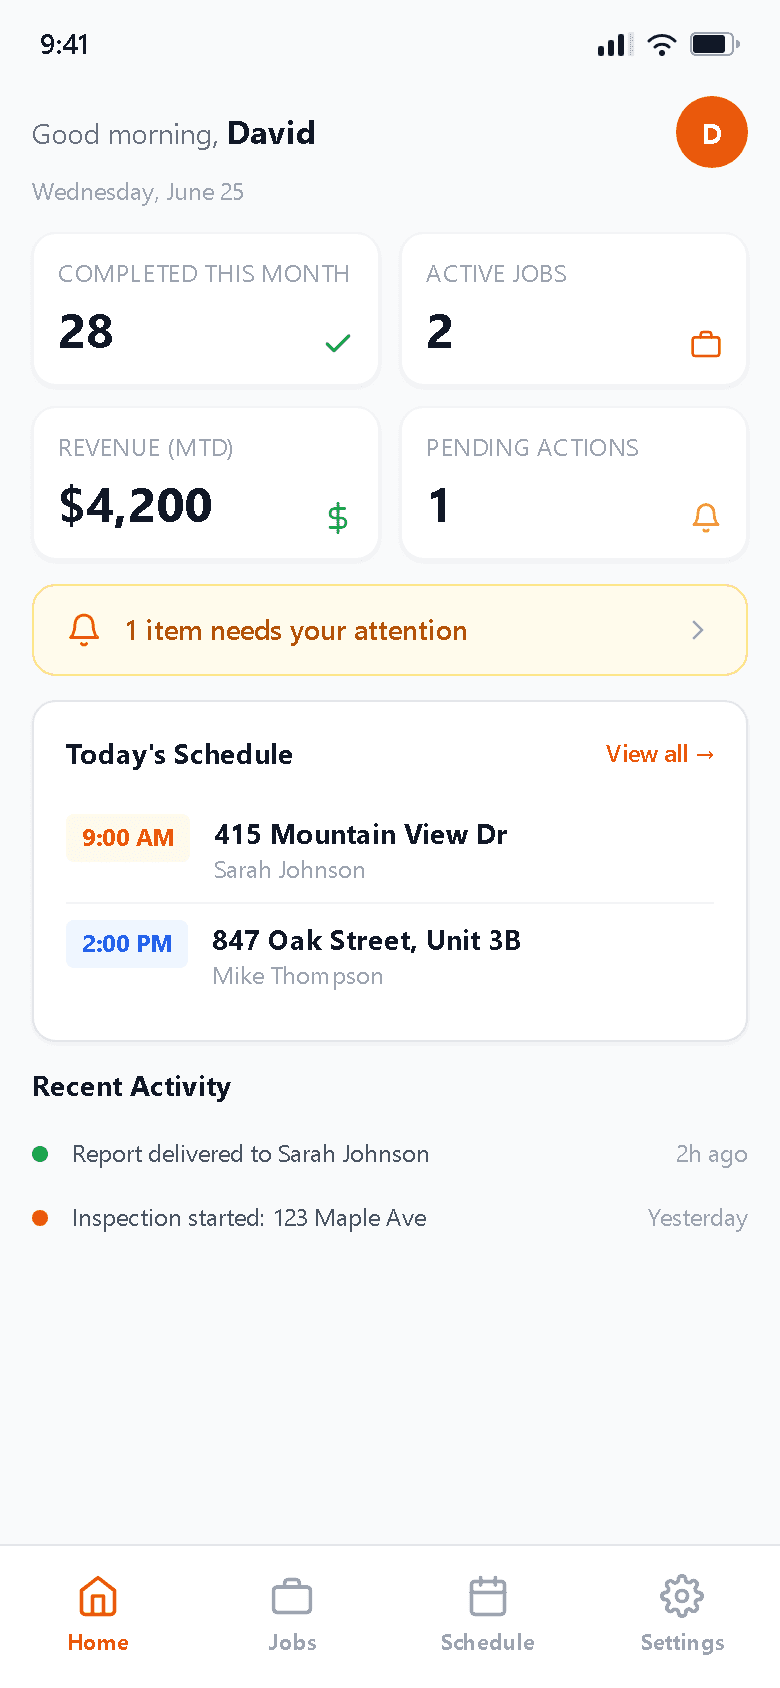
Dashboard
A quick overview of your numbers: completed jobs this month, active jobs, month-to-date revenue, and pending actions. Today's schedule is shown below the stats.
Reports & Delivery
Once an inspection is complete, you can review the full section-by-section report summary and send the PDF directly to your client — all from your phone.
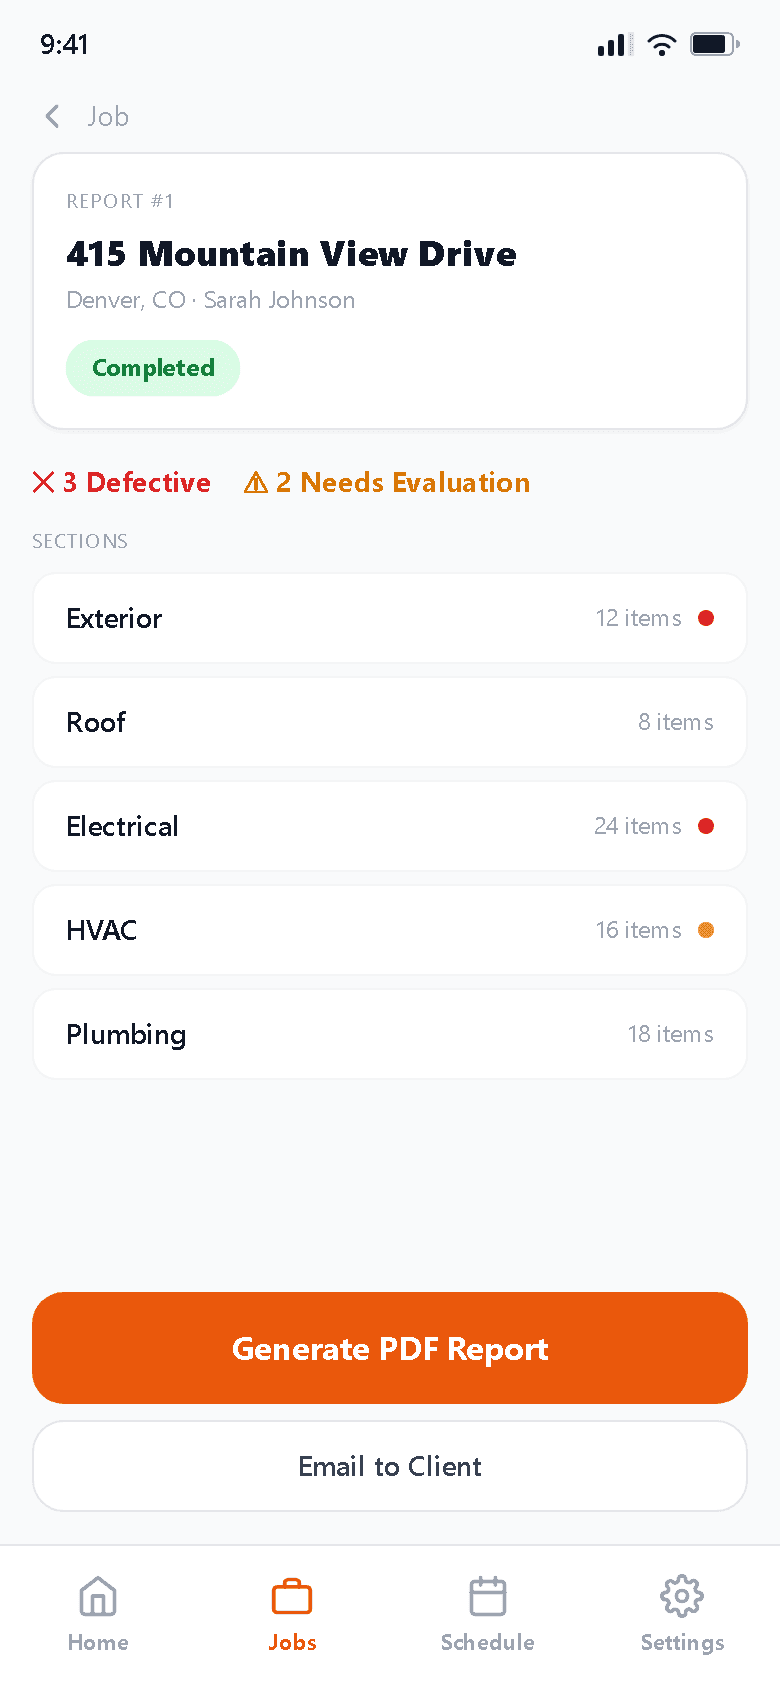
Report Preview
A summary of the completed inspection: total defects found, items needing evaluation, and a clickable list of all sections. Tap "Generate PDF Report" to create the final document.
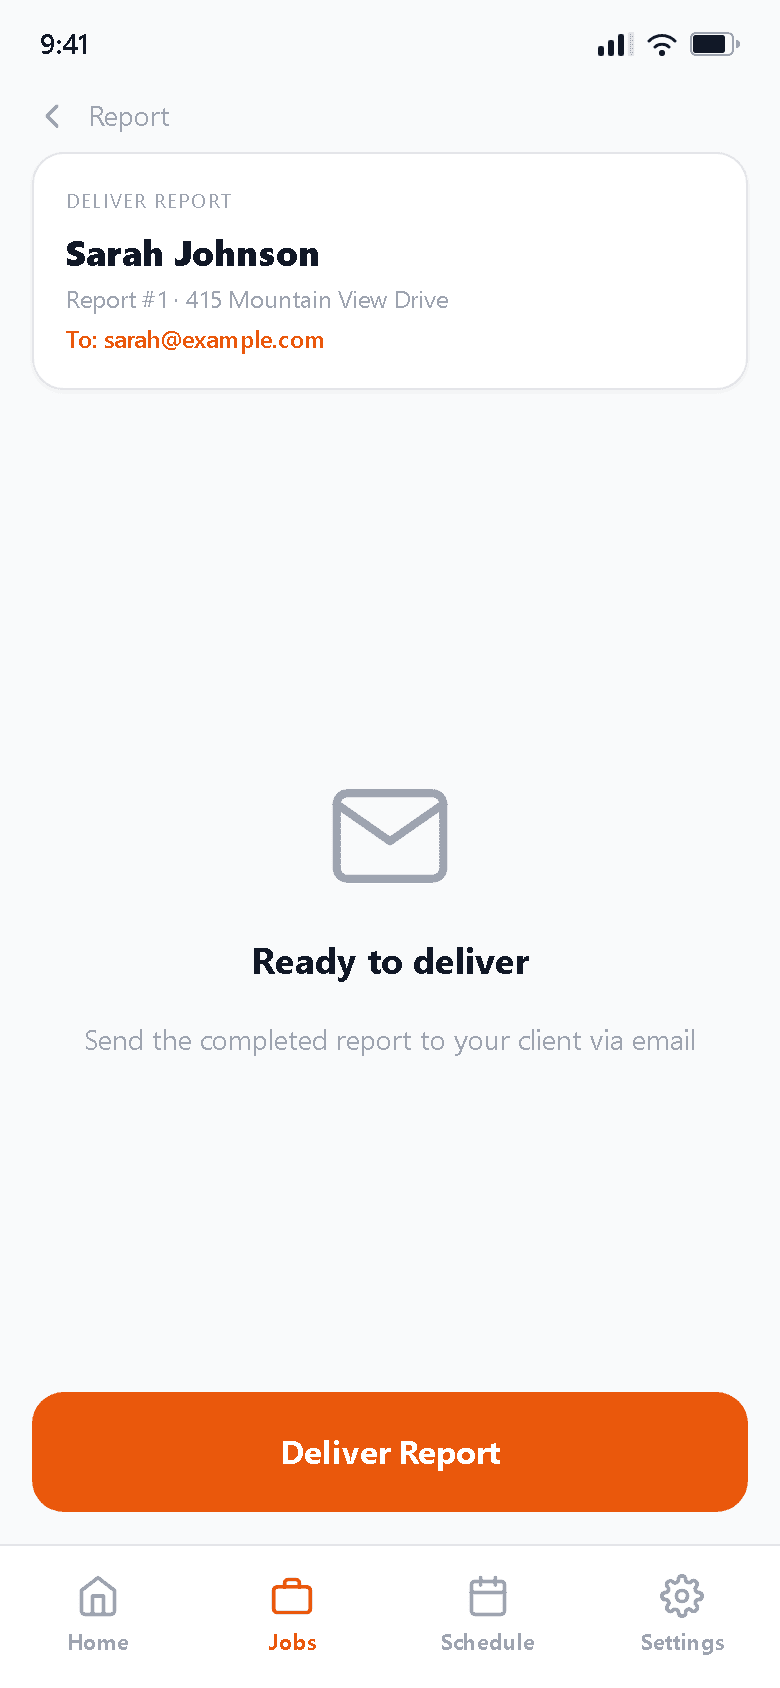
Report Delivery
Confirm the client's email address, then tap "Deliver Report." InspectForge emails the PDF directly to your client and logs the delivery timestamp on the job record.
Clients, Templates & Agreements
These screens let you manage the supporting data for your business — your client list, the inspection templates you use in the field, and your pre-inspection agreement forms.
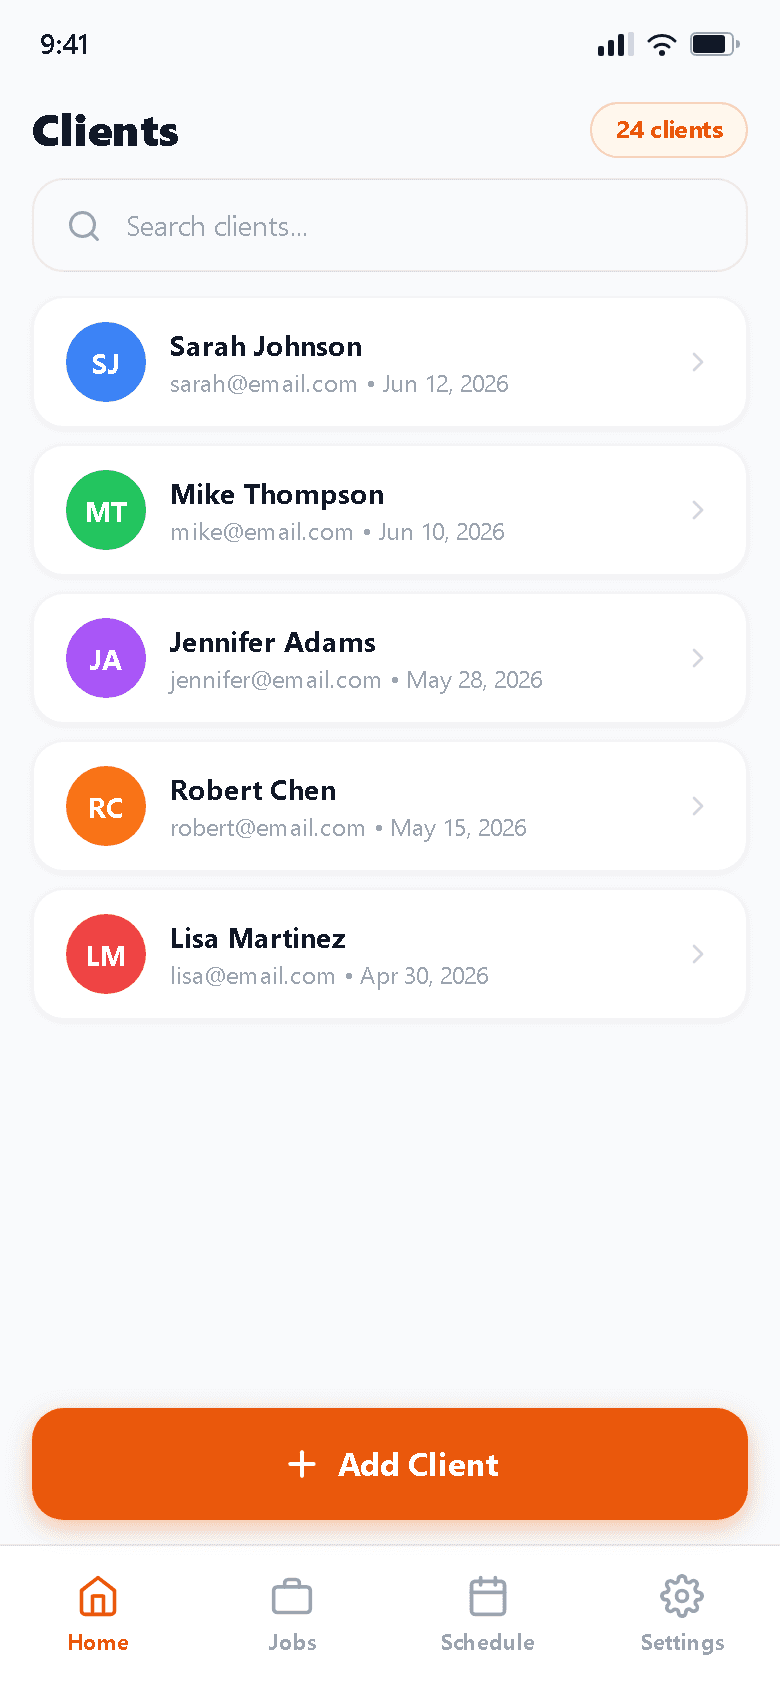
Clients
A searchable list of everyone you've inspected for. Tap a client to see their history. Tap "Add Client" to manually add someone before sending an agreement or scheduling a job.
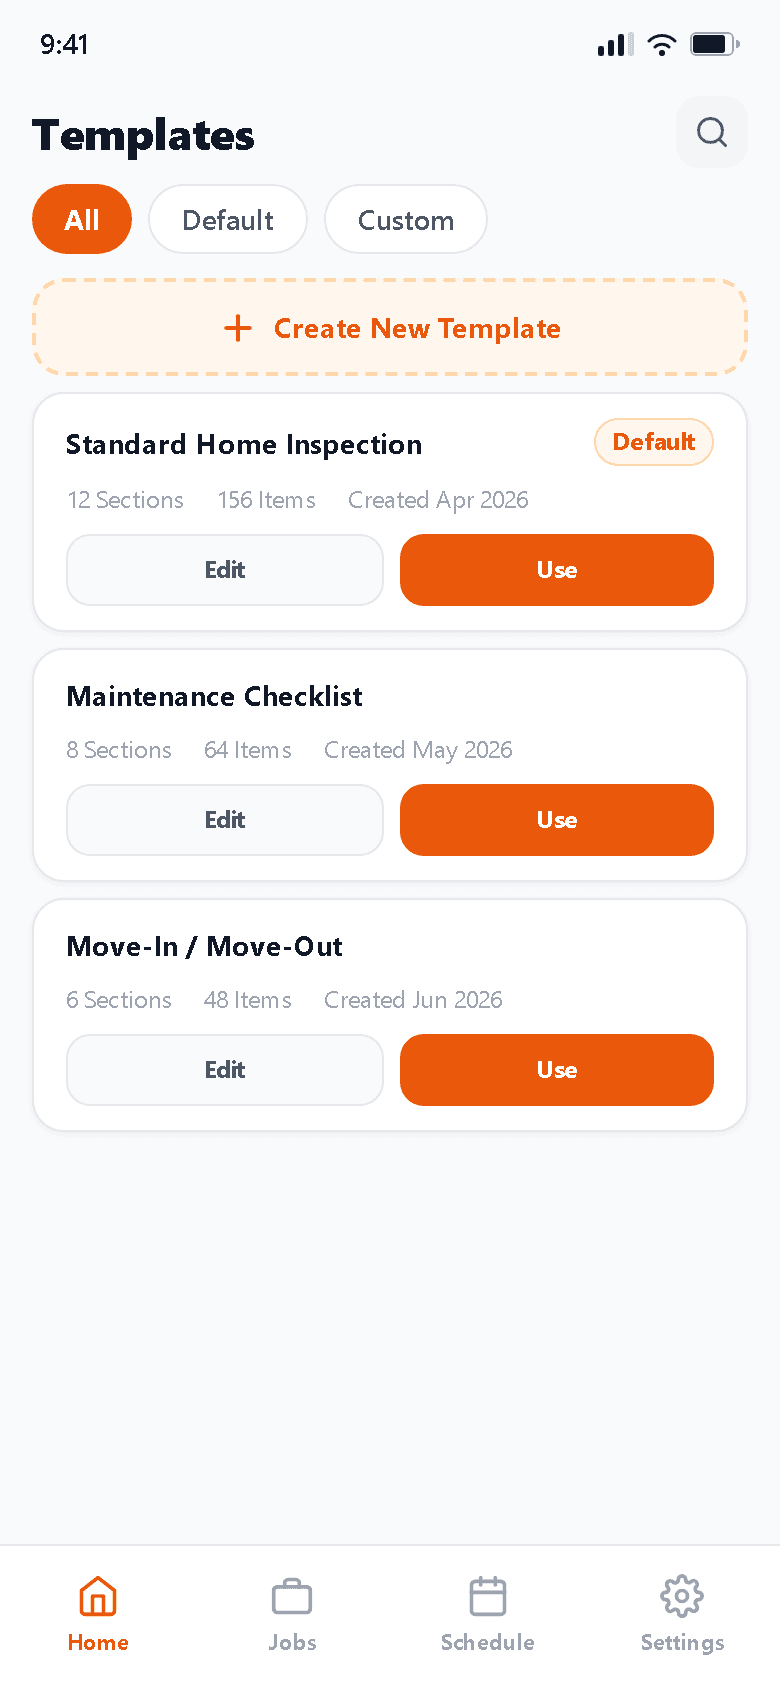
Templates
Your inspection templates — the structured checklists you follow in the field. The Default template is automatically selected in Quick Start. Tap "Use" to start an inspection, or "Edit" to customize sections and items.
Agreements
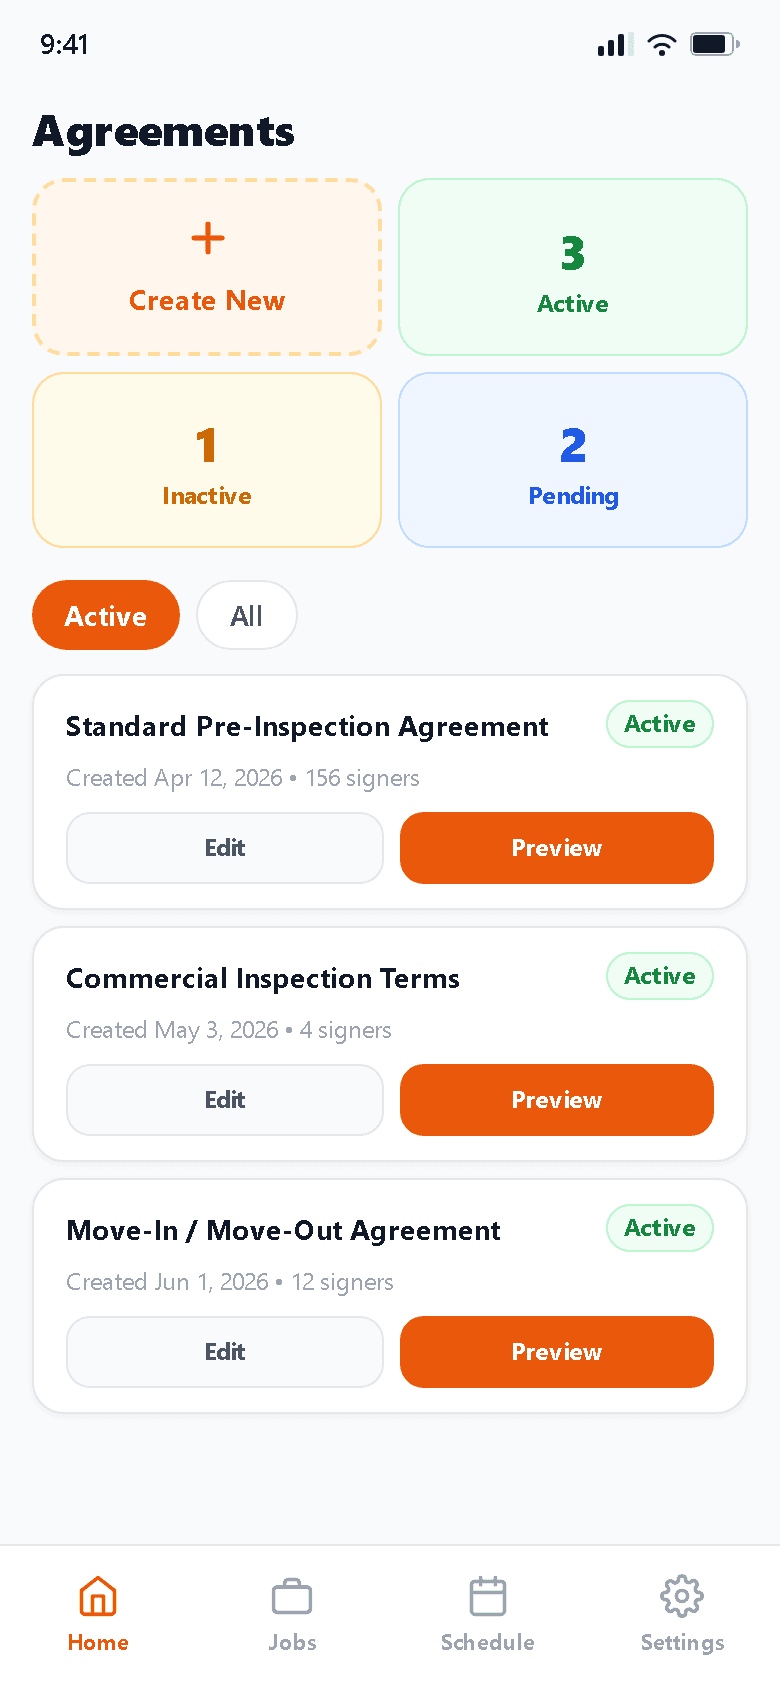
Pre-inspection agreement forms you send to clients before the job. The bento grid at the top shows counts by status. Active agreements can be sent to clients for e-signature via email link.
Notifications & Settings
Stay on top of what's happening with your account and customize the app to fit how you work.
Notifications
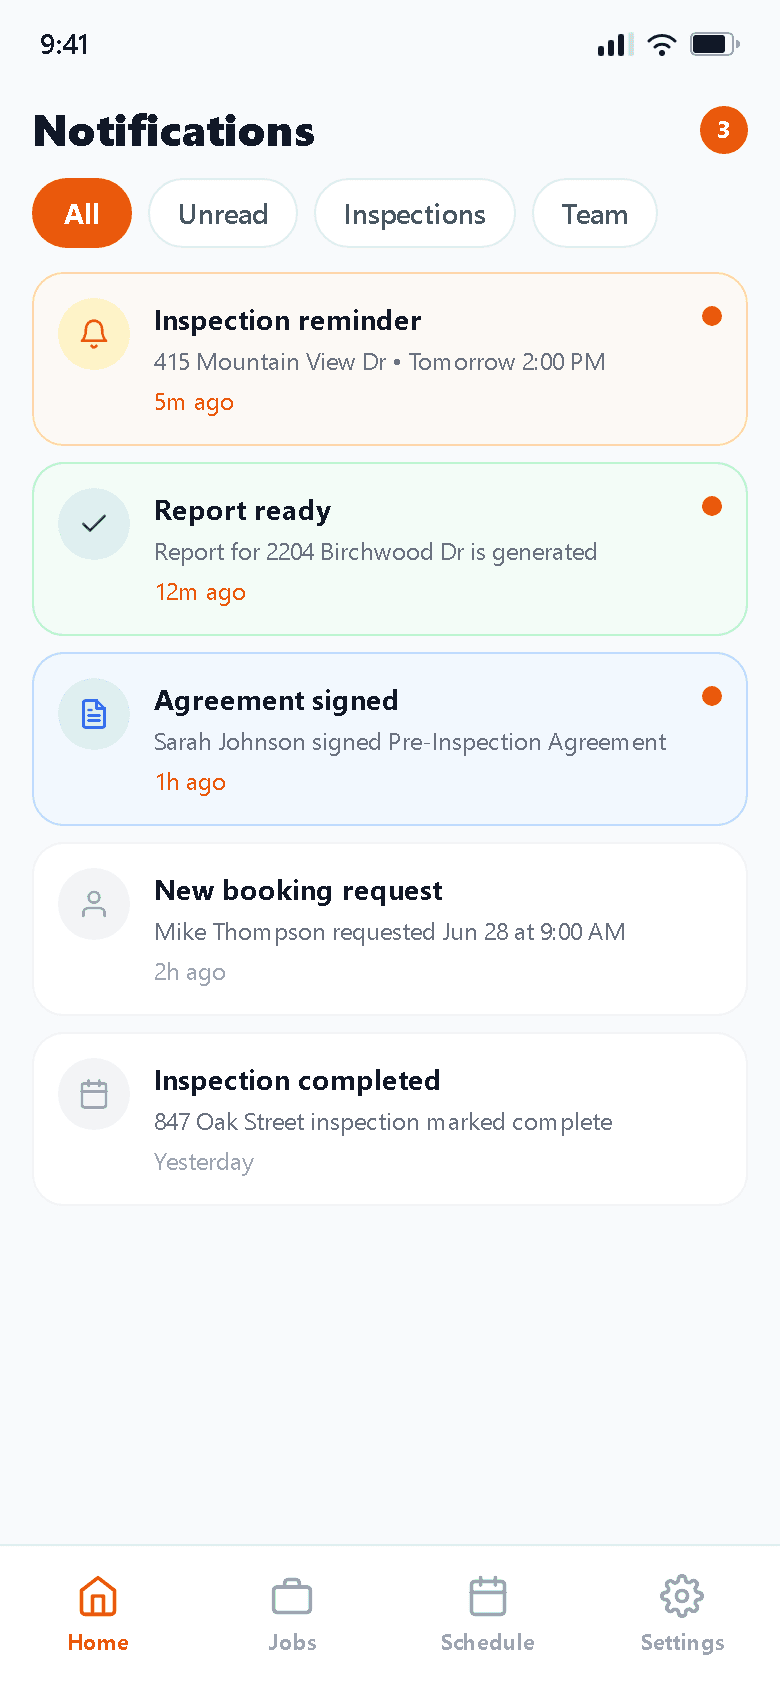
Unread notifications appear with a colored icon and orange dot. Tap the filter tabs — All, Unread, Inspections, Compliance, Assets, and Team — to narrow the list.
Settings
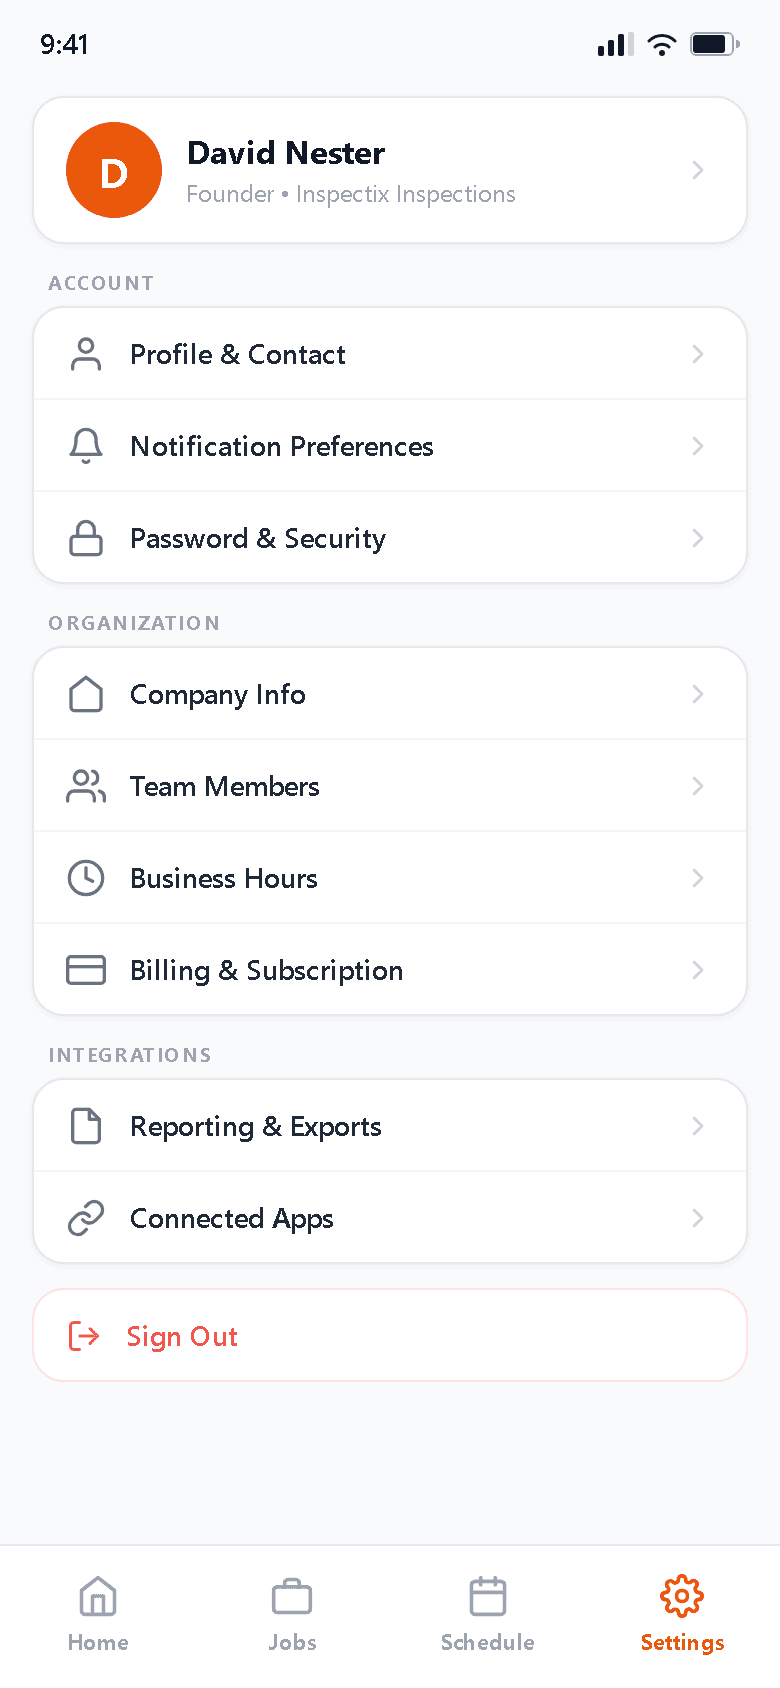
Manage your profile, company info, team members, business hours, billing, and integrations. Tap any group to expand its full set of options.
Ready to try it yourself?
Sign up free — no credit card required. Your first inspection is on us.